Documentation
This page describes how to install and use Mr. RIGANTI.
Getting Started
To create an account, just sign in or use the Try For Free button on the home page.
You will be taken to a page that asks you to sign in using Microsoft Work account.
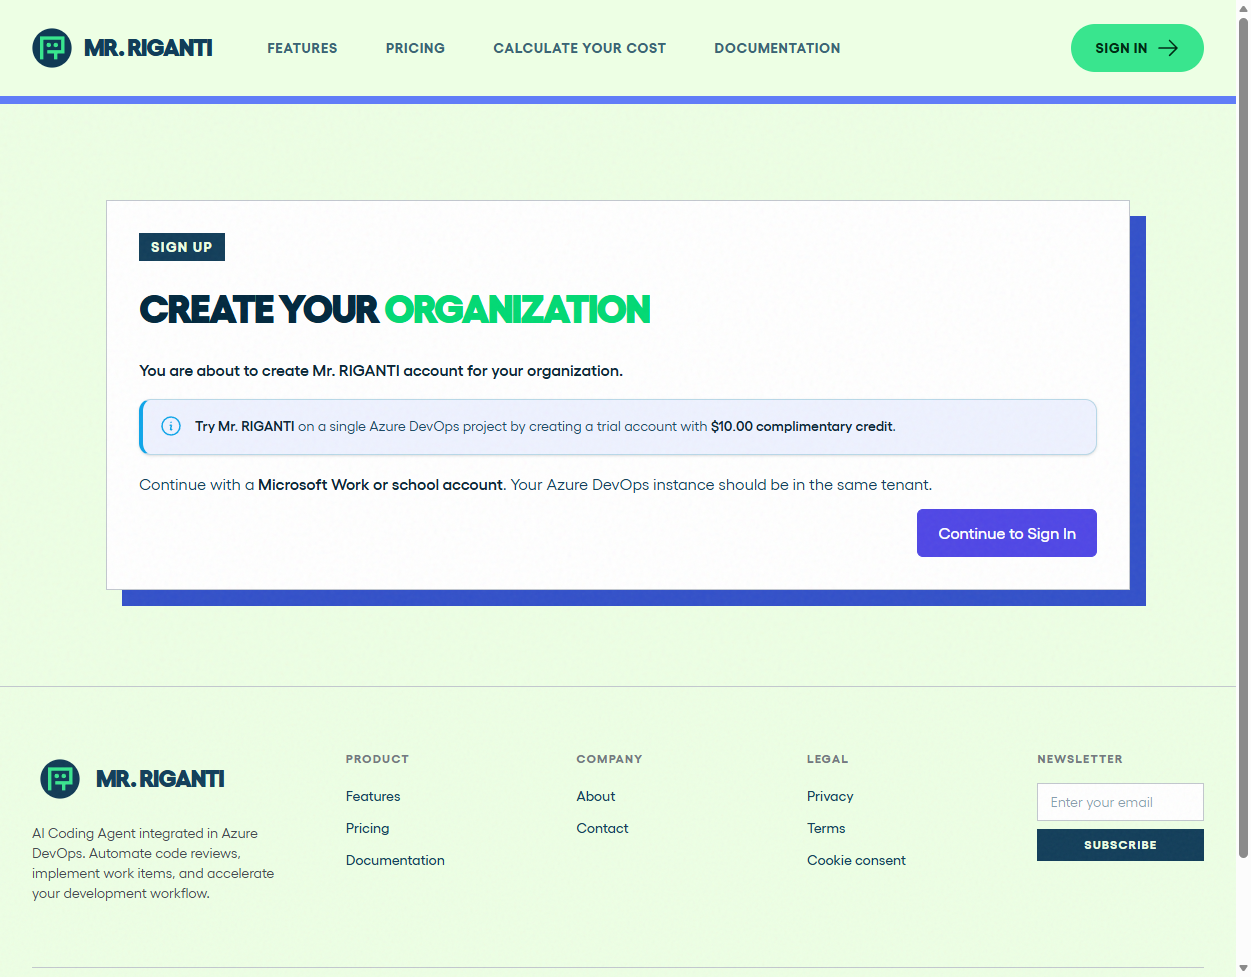
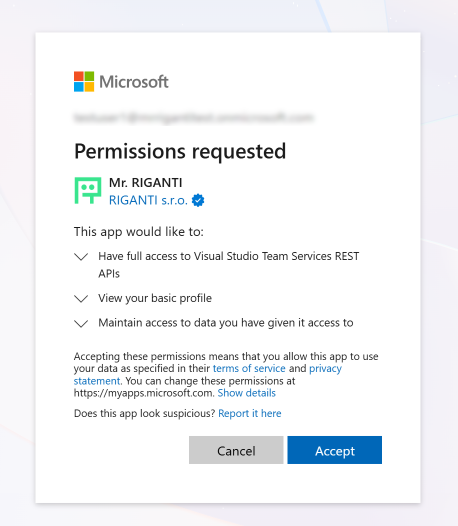
When first signing into Mr. RIGANTI, you will need to grant consent to Mr. RIGANTI application.
The next step will ask you to enter your organization name and contact e-mail address. After you complete the form, your account will be created and you will be able to connect your Azure DevOps service.
At the beginning, you will be able to use complimentary $10 of credit. After you consume it, you will need to purchase a plan.
Connecting Azure DevOps
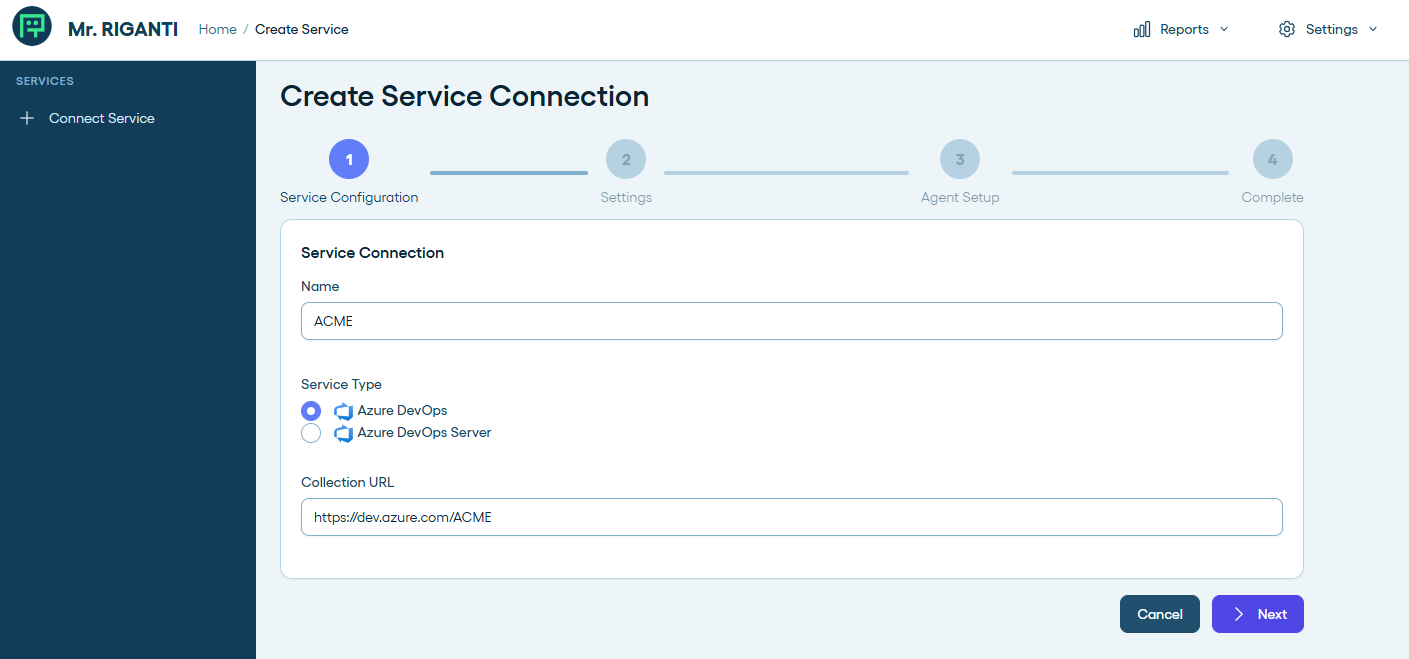
To use Mr. RIGANTI in your Azure DevOps, you need to connect the service and configure the user account. Start by clicking on Connect Service button.
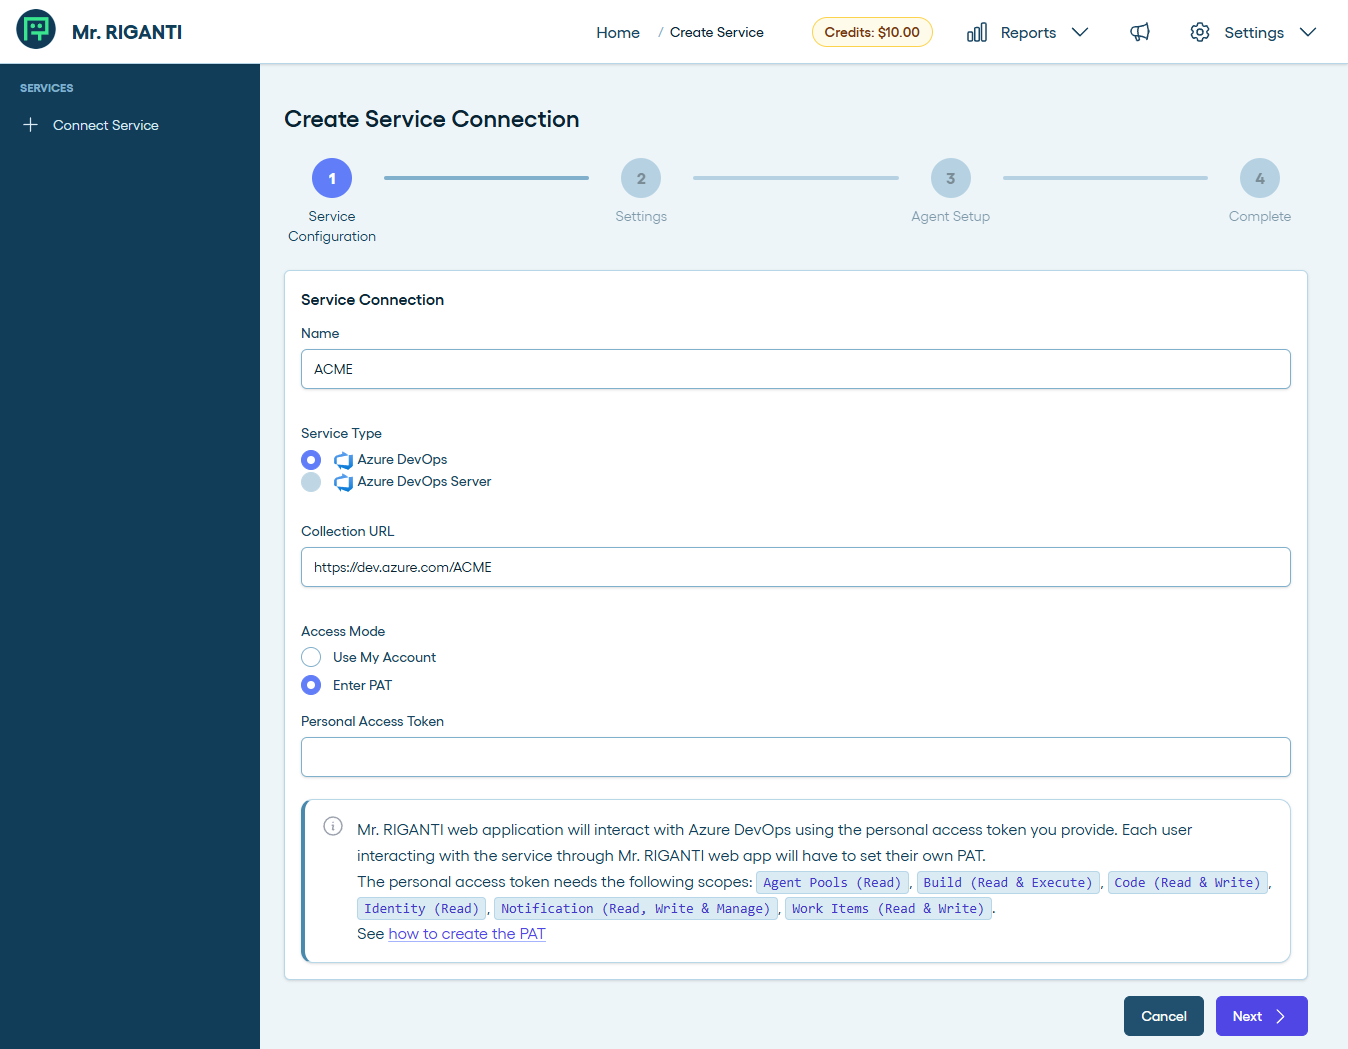
On the first step, name your Azure DevOps instance (any name can be used) and enter its URL (the format is https://dev.azure.com/YOUR_COMPANY.
Make sure you are signed with an Azure Entra ID account that has access the Azure DevOps instance.
Option 1: Connect using Use My Account access mode
Select Use My Account to let Mr. RIGANTI web application interact with Azure DevOps on your behalf using the same Microsoft work account you used for signing in.
This is the easiest way, but it requires you to allow Mr. RIGANTI the Azure DevOps delegated API permission Access Azure DevOps (user_impersonation).
This permission basically allows Mr. RIGANTI to call the Azure DevOps API as you. The application can perform only the operations that your account is allowed to perform in the selected Azure DevOps organization. Depending on your organization's consent policy, an administrator may need to approve the permission.
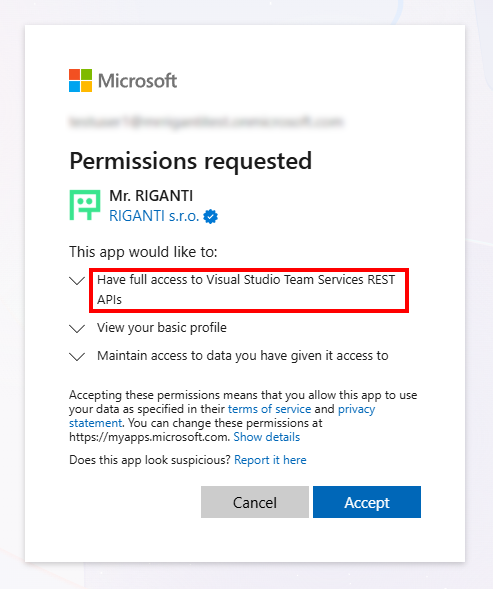
This option is not supported when Azure DevOps organization is hosted in a different Azure Entra ID tenant than the account you used to sign in to Mr. RIGANTI.
Option 2: Connect using Personal Access Token access mode
If the first option cannot be used, select the Enter PAT to connect without granting the Azure DevOps delegated API permission.
You will need to create a personal access token in the Azure DevOps organization using the account you normally use to interact with Azure DevOps.
- Open a new browser tab and navigate to your Azure DevOps organization.
-
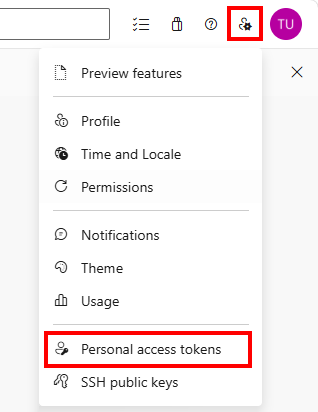
Click on the icon next to your profile picture in the top right corner and select the Personal Access Tokens option.
-
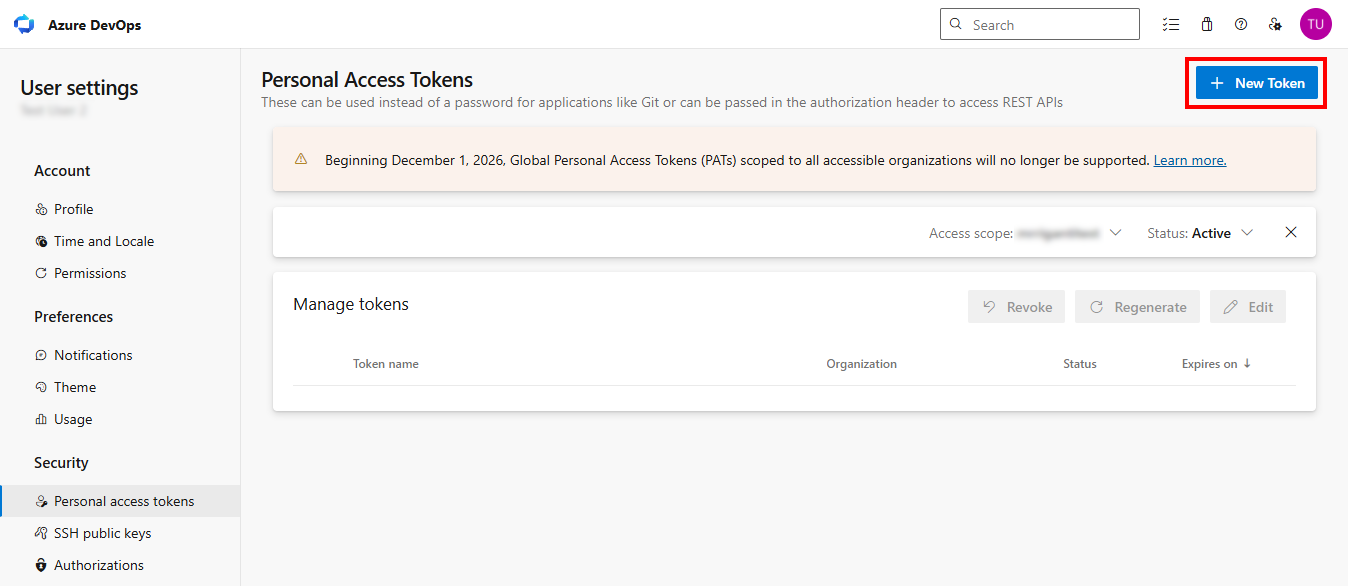
Click on the New Token button.
-
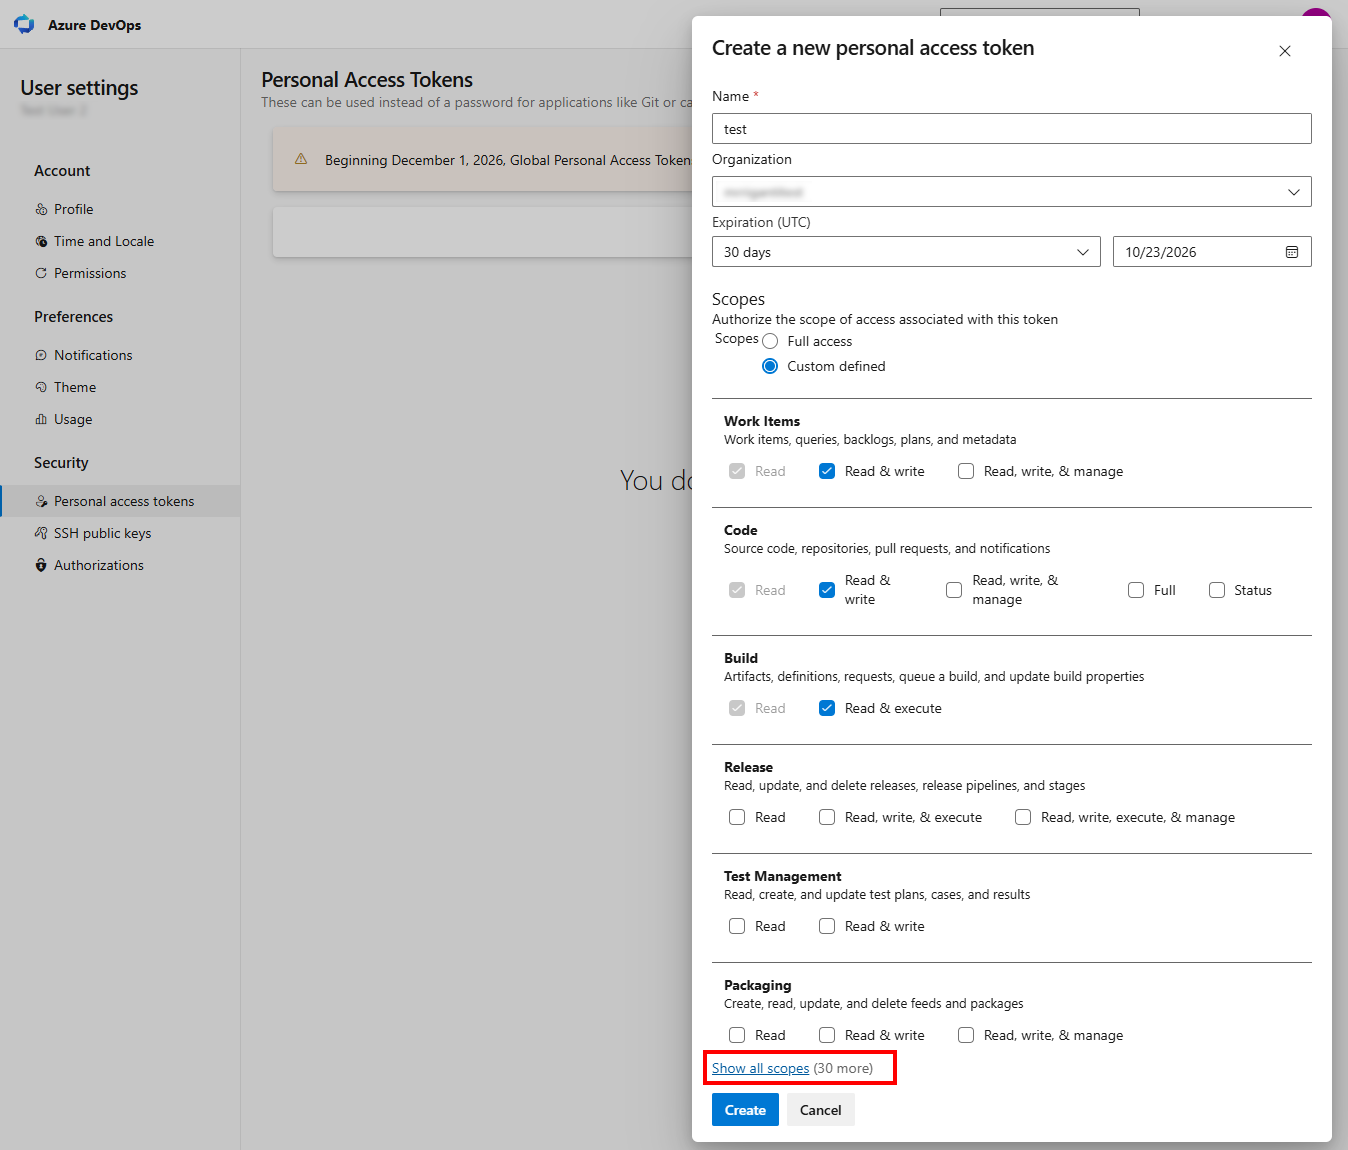
Click on the Show all scopes button.
-
Select the following scopes:
Agent Pools (Read & Manage),
Build (Read & Execute),
Code (Read & Write),
Identity (Read),
Notification (Read, Write & Manage),
Work Items (Read & Write),
and confirm the choice. -
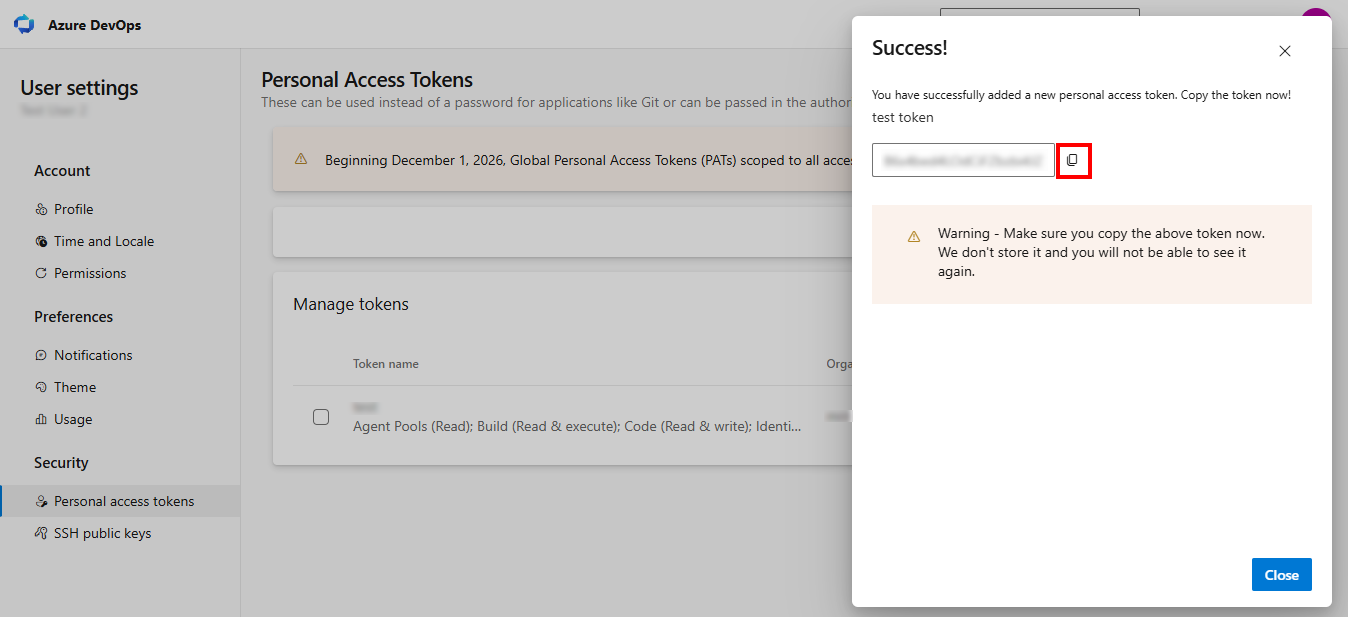
Copy the generated token.
-
Paste it into the Personal Access Token field in the Mr. RIGANTI web application.
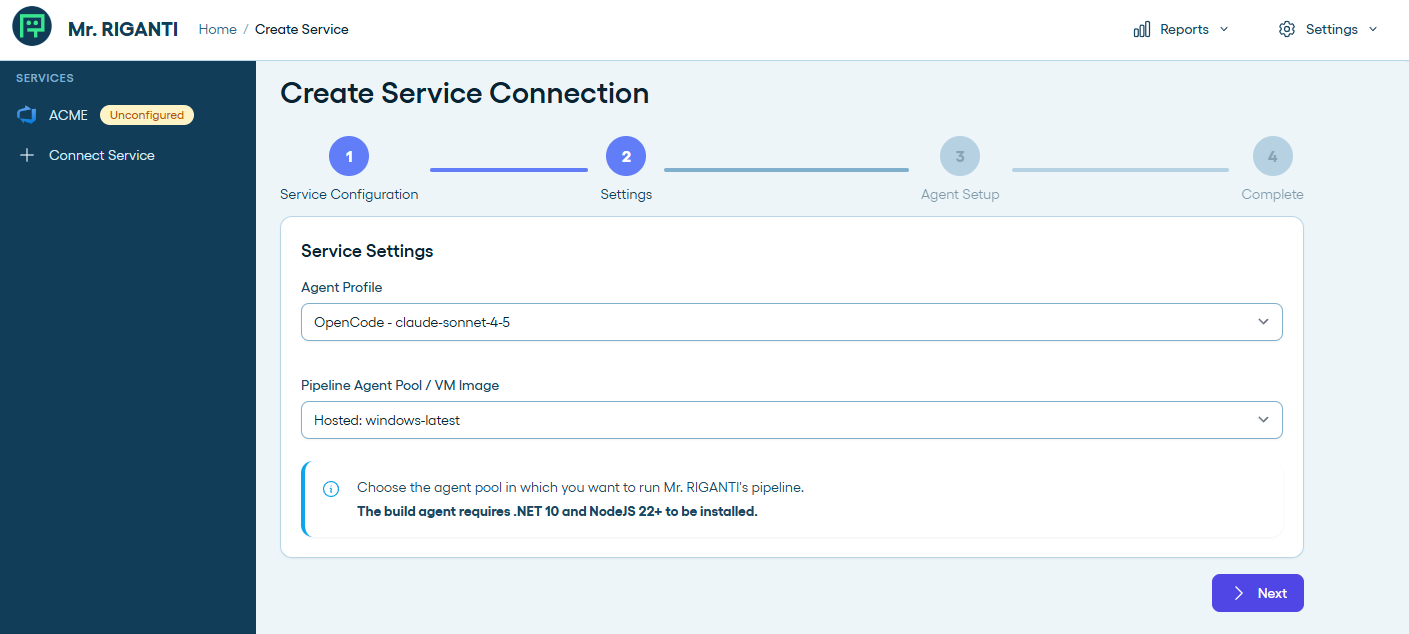
Service Settings Step
In step 2, you can configure the default coding agent and model, and the agent pool in which the coding agent is supposed to run. You will be able to change these values later.
If you plan to use self-hosted agents, make sure they have .NET 10 and Node JS 22+ installed.
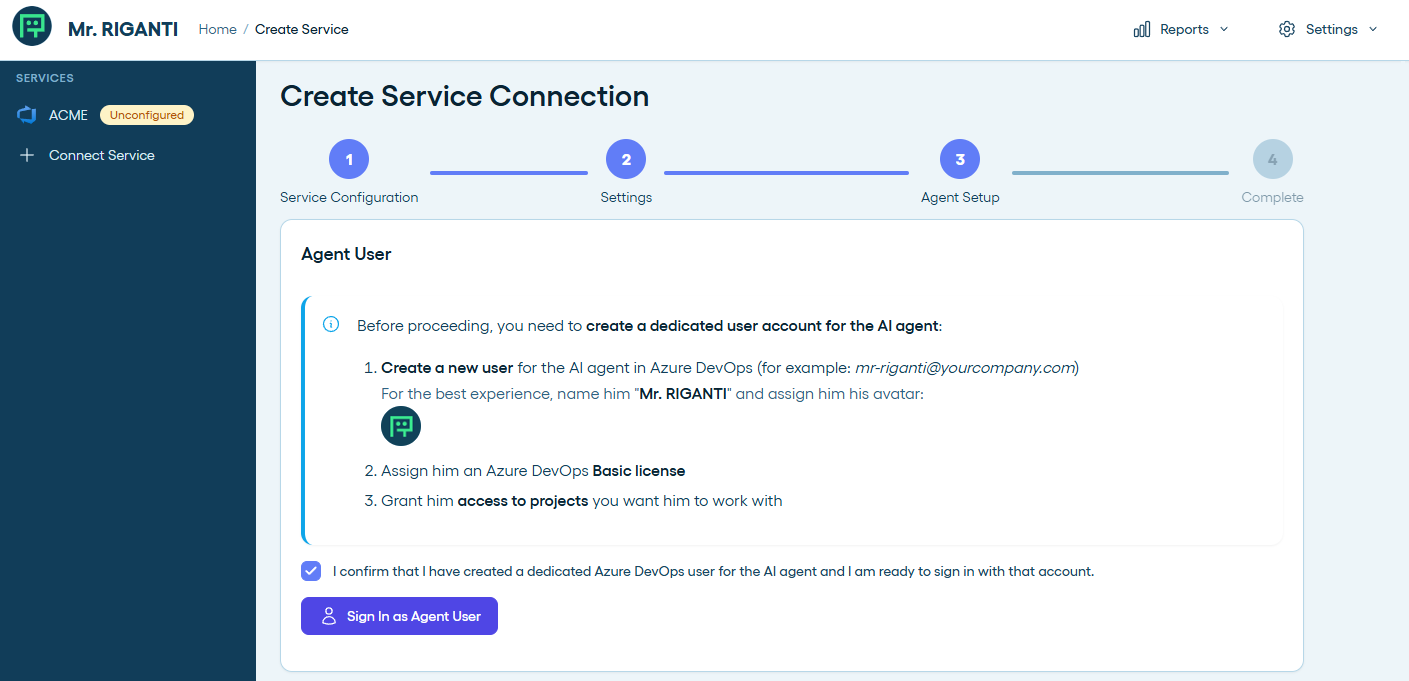
Agent User Step
Next, you will need to perform several steps:
-
Create a new user that will act as the agent.
For the best experience, name him "Mr. RIGANTI" and assign him his avatar: (click to download)

- Assign him an Azure DevOps Basic license.
- Grant him access to projects you want him to work with.
Same as in the previous step, you have two options:
- Option 1: Sign in as Agent User
- Option 2: Enter Agent User PATs (Personal Access Tokens) manually
Before you proceed, indicate that the agent user account is ready.
Option 1: Sign in as Agent User
Click on the Sign In as Agent User button. A pop-up window will appear prompting you to enter the agent user's credentials.
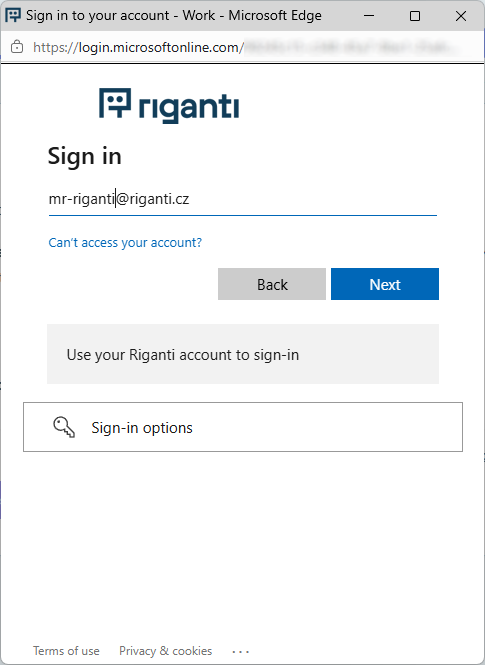
After successful authentication, the service will automatically create a connection to your Azure DevOps instance and generate the necessary PATs for the agent user (transition to Azure Entra ID tokens is coming soon).
Option 2: Enter Agent User PATs (Personal Access Tokens) manually
- Open a new anonymous browser tab and navigate to your Azure DevOps organization.
- Sign in as the agent user.
-
Click on the icon next to your profile picture in the top right corner and select the Personal Access Tokens option.
-
Click on the New Token button.
-
Click on the Show all scopes button.
-
Select the following scopes:
Build (Read & Execute),
Code (Read & Write),
Identity (Read),
Work Items (Read & Write),
and confirm the choice. -
Copy the generated token.
-
Paste it into the Personal Access Token field in the Mr. RIGANTI web application.
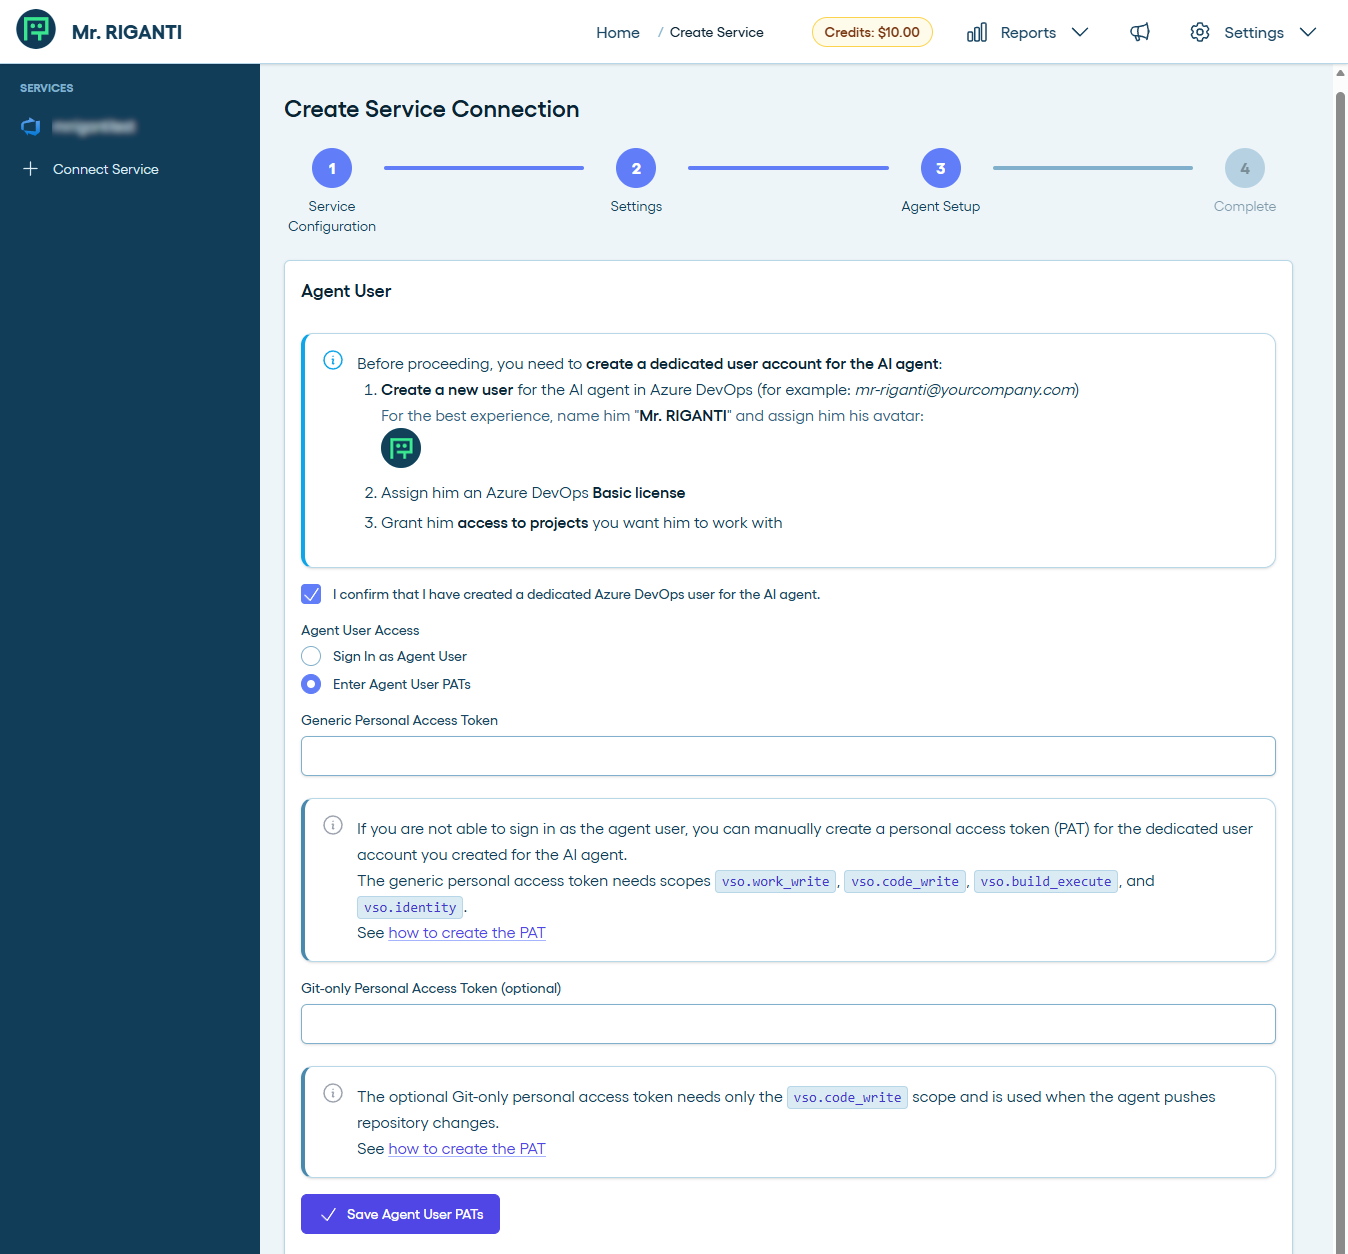
- Return to the Azure DevOps.
-
Use the same approach to create a second Personal Access Token with the following scope:
Code (Read & Write). - Paste it into the Git-only Personal Access Token field in the Mr. RIGANTI web application.
Finish the configuration
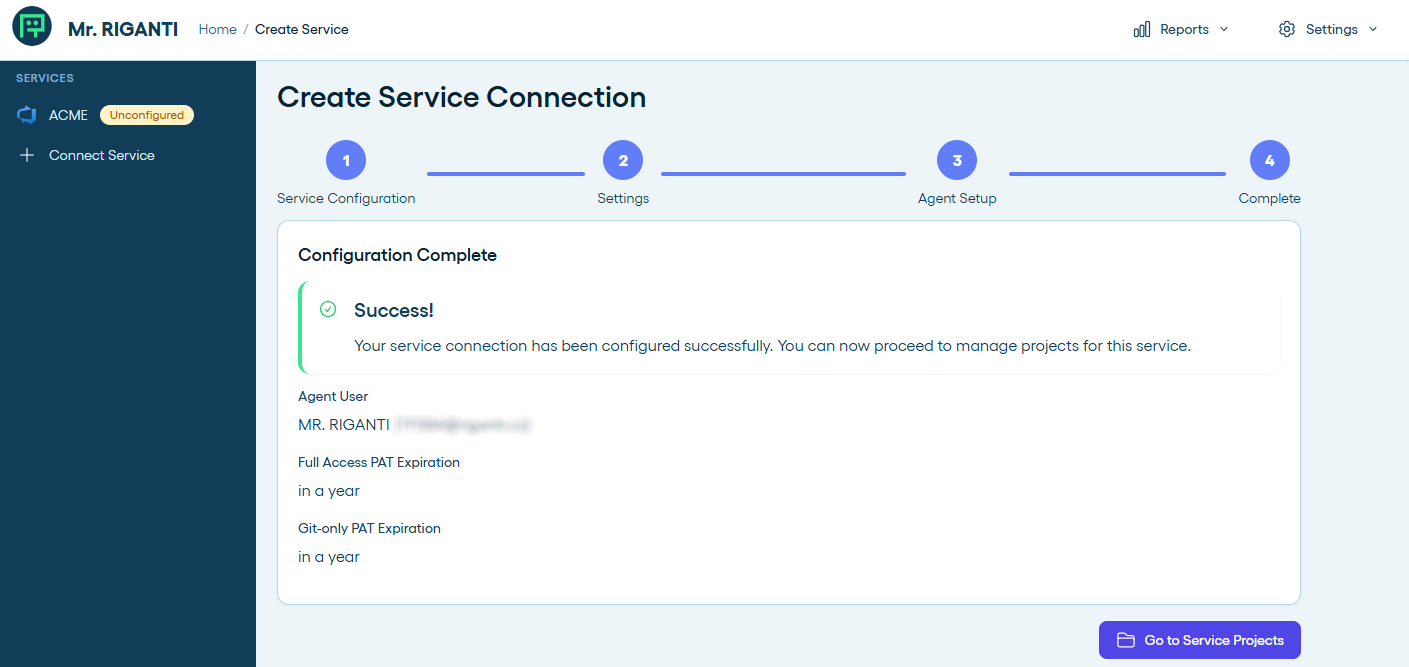
Congratulations! You have successfully connected your Azure DevOps instance to Mr. RIGANTI. You can now onboard him in your Azure DevOps projects!
Connecting Azure DevOps Server
This feature is coming soon.
Onboarding Mr. RIGANTI in projects
To start using Mr. RIGANTI in a particular project, you need to onboard him. This will:
- Set up webhooks to let Mr. RIGANTI know when some event happens in the project (for example, when issues or pull requests are assigned to him, or when somebody mentions him in a comment).
- Set up a build pipeline that will let Mr. RIGANTI work in the context of the Git repository - for example, make a code review, or implement a feature.
The main dashboard shows a list of projects accessible in the connected Azure DevOps instance under your user account. Select a project for onboarding by clicking at the Onboard Project button.
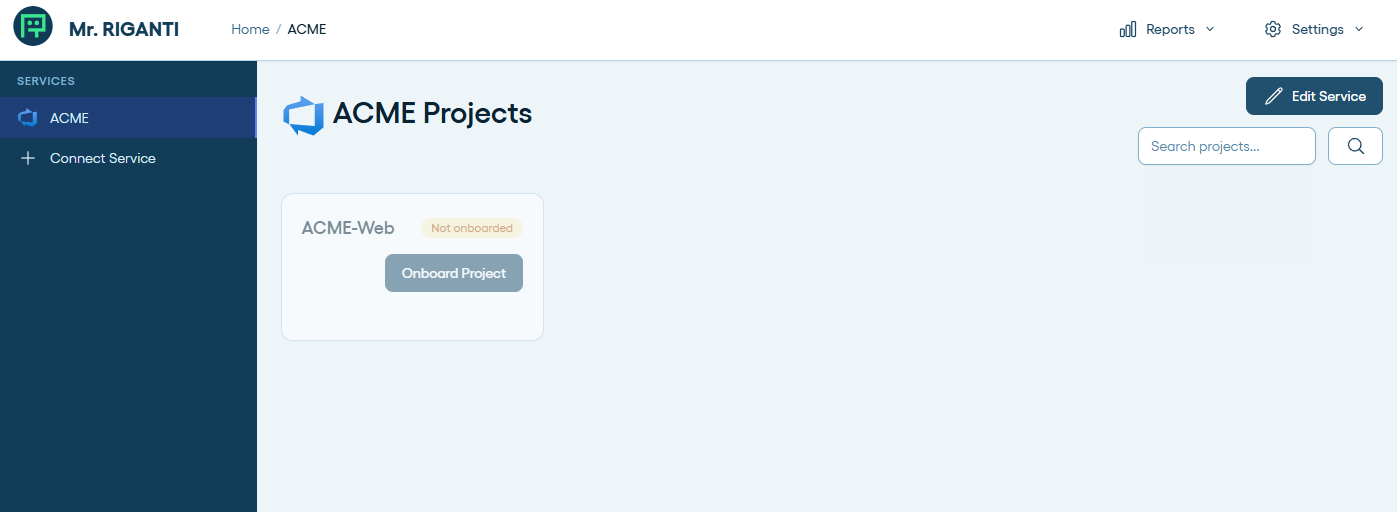
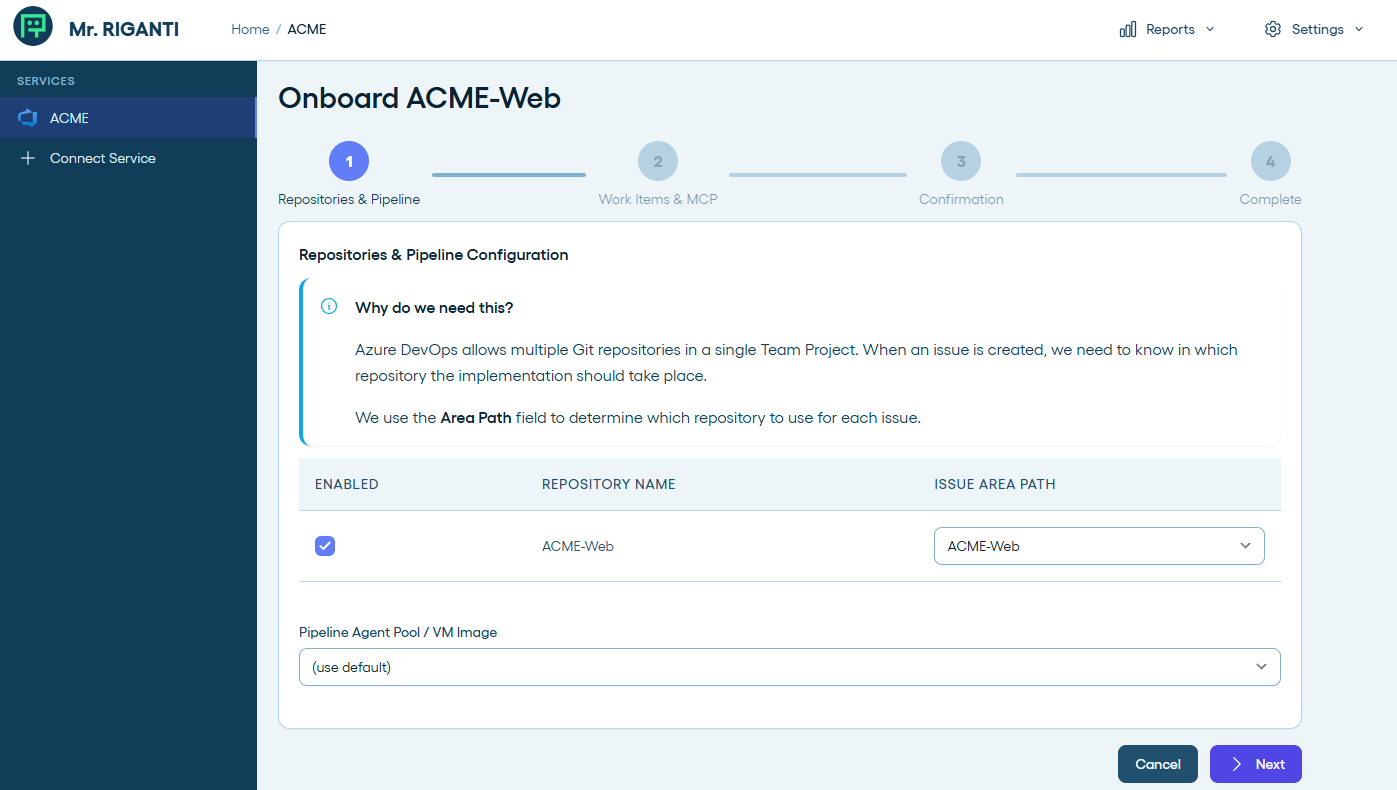
Azure DevOps supports multiple Git repositories in a single project. You can choose which repositories you want to onboard Mr. RIGANTI in, and also map the work item areas to repositories (this will help Mr. RIGANTI to decide in which repository he should do his work).
You may also choose to use a different agent pool than the one configured on the service level.
In the next step, you can select to which work items types Mr. RIGANTI should respond to.
We recommend to keep the default settings. Technically, you can assign the whole Epic to Mr. RIGANTI, but the chances are that he will get overwhelmed with the amount of work and will not be able to process it effectively.
You can also select a different coding agent profile and model for this project. This will allow you to use different settings for Mr. RIGANTI in different projects - for example, you can have a more "aggressive" coding agent in one project, and a more "conservative" one in another project.
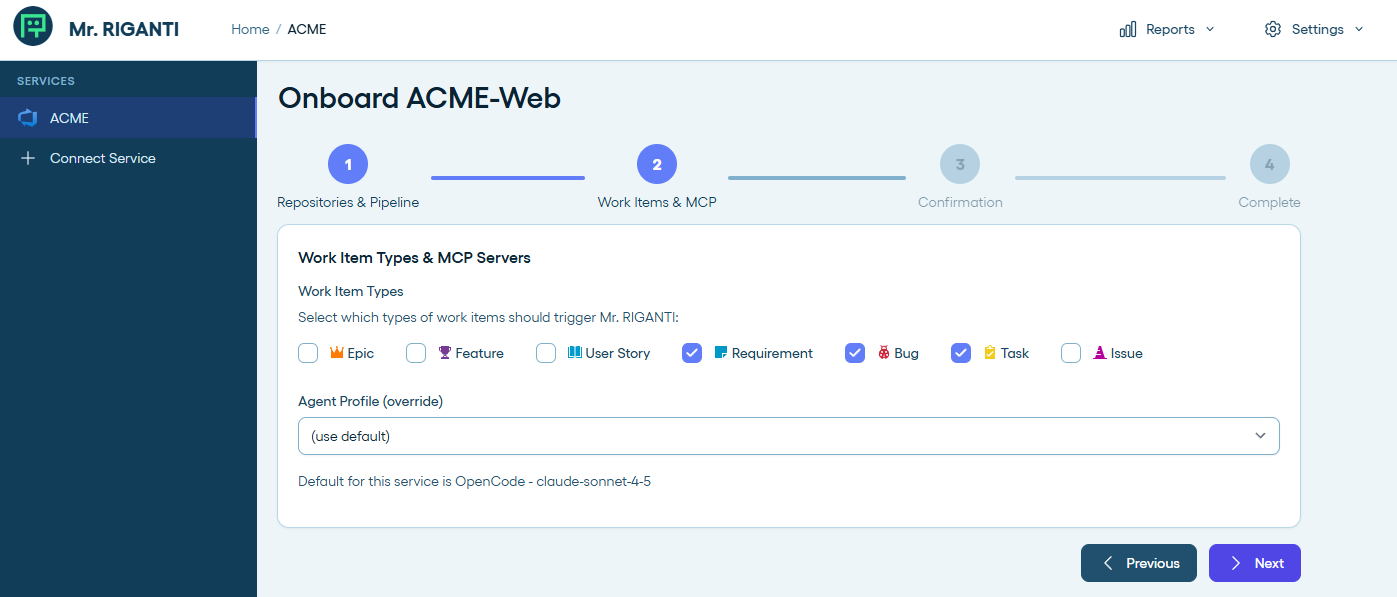
The next step just informs you what happens next.
You should have Project Administrator role, or sufficient permissions to configure Service Hooks and create build pipelines in the project to be able to onboard Mr. RIGANTI.
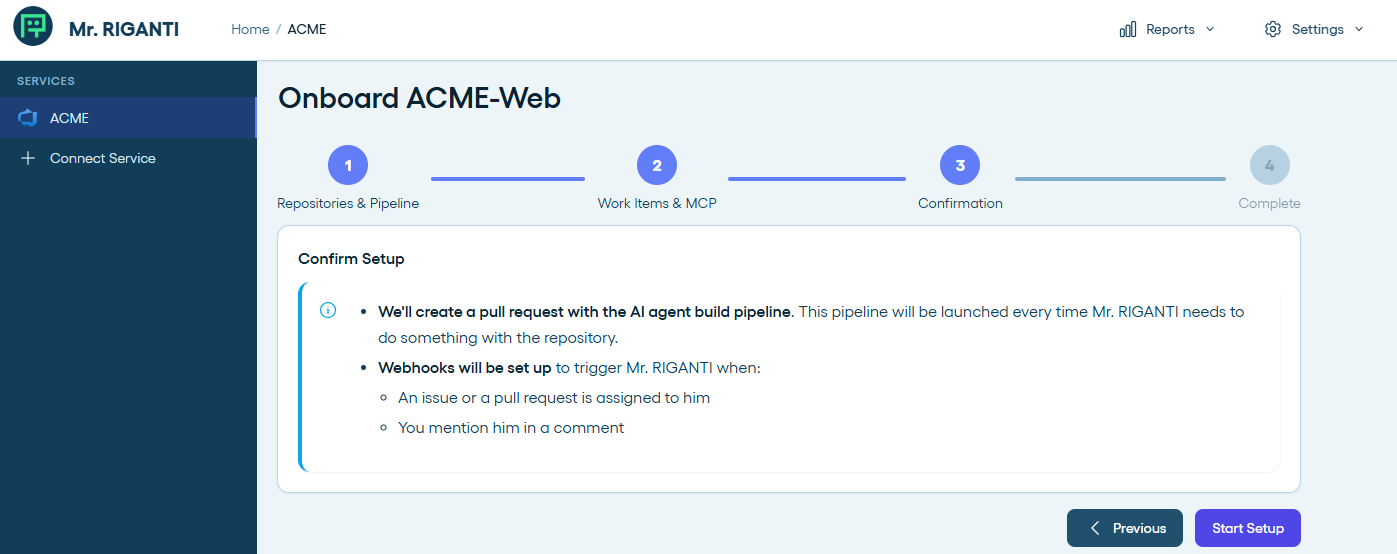
After proceeding, the service will:
- Set up webhooks for the following actions:
workitem.created,workitem.updated,build.complete,git.pullrequest.created,git.pullrequest.updated, andms.vss-code.git-pullrequest-comment-event - Create a branch
mr-riganti/setupin each of the selected Git repositories which adds.mr-riganti/pipeline.ymlpipeline file. - Open a pull request with the branch created in the previous step, so that you can review the pipeline configuration and merge it to the main branch.
- Create a build pipeline based on the
.mr-riganti/pipeline.ymlfile in each of the selected repositories.
If the process ends with an error, you can check the error message and try to run the setup again. It will skip the steps that were completed successfully and try to execute the steps that failed again.
After the successful setup, you will need to review and approve Mr. RIGANTI pull request in each of the configured repositories.
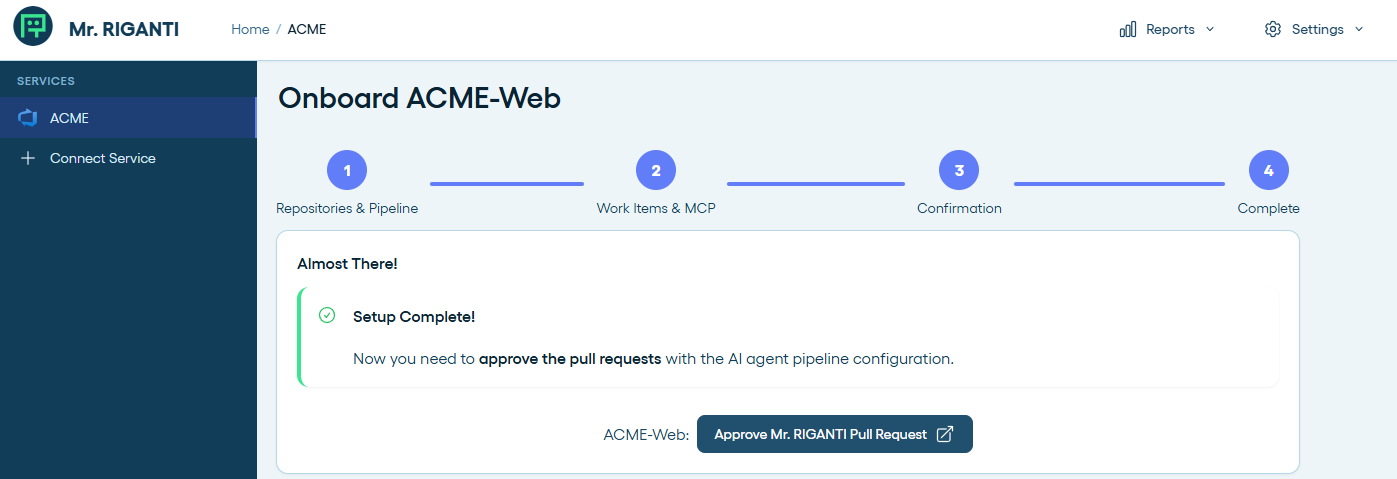
Make sure the pull request is merged before start interacting with Mr. RIGANTI. If you trigger him in pull requests that were created earlier, you will receive an error because the Mr. RIGANTI's pipeline would not be accessible.
Usage
Mr. RIGANTI can:
- Make code reviews in pull requests assigned to him.
- Work on issues (work items) assigned to him - for example, implement a feature described in the issue, or fix a bug.
- Respond to mentions in comments - for example, if somebody mentions Mr. RIGANTI in a comment and asks him to do something, he will run a pipeline and try to do it.
Code Review of Pull Requests
You can assign Mr. RIGANTI as a reviewer to a pull request. He will immediately start a pipeline and look at changes made in the PR.
We recommend to assign him as Optional reviewer. This way, he will not be able to block merging of the pull request.
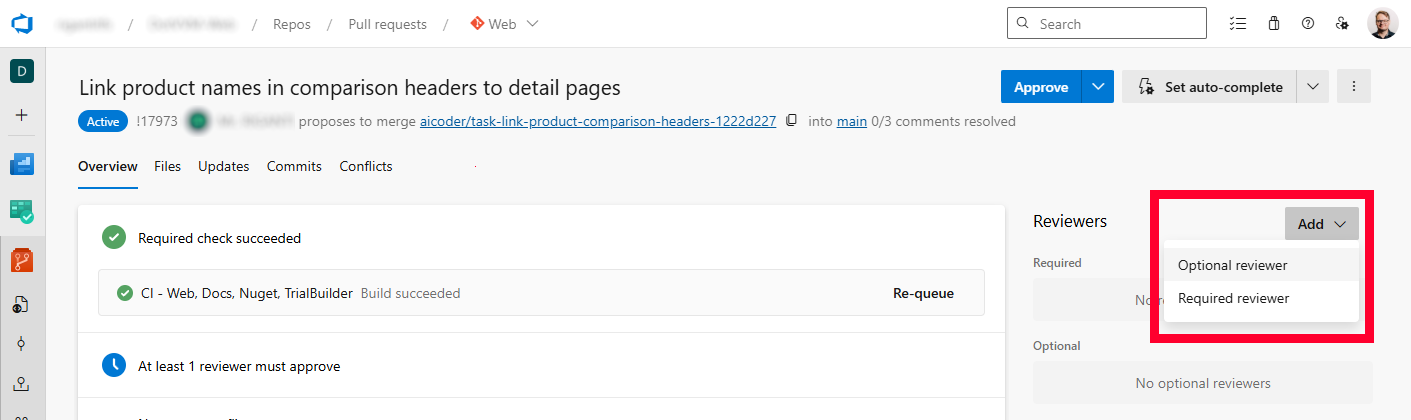
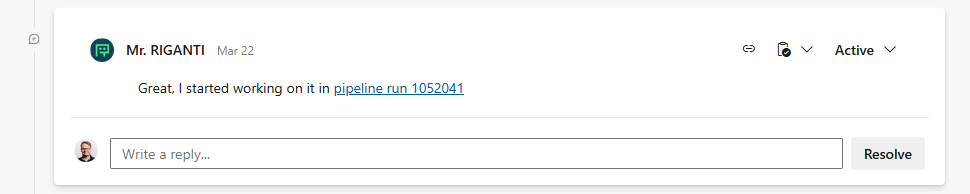
To let you know that Mr. RIGANTI started working, he will post a comment with a link to the pipeline in which he runs. Feel free to look at the detailed logs to oversee his actions.
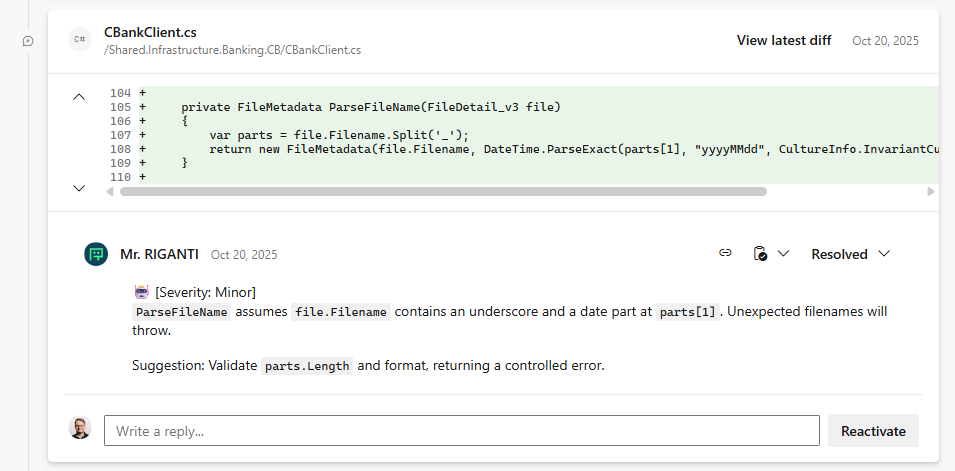
After a couple of minutes, you will start seing his comments in the pull request. He will comment on the code quality, suggest improvements, and also point out any potential bugs he finds.
The code review is finished with a verdict comment, in which Mr. RIGANTI summarizes his findings and gives an overall assessment of the pull request.
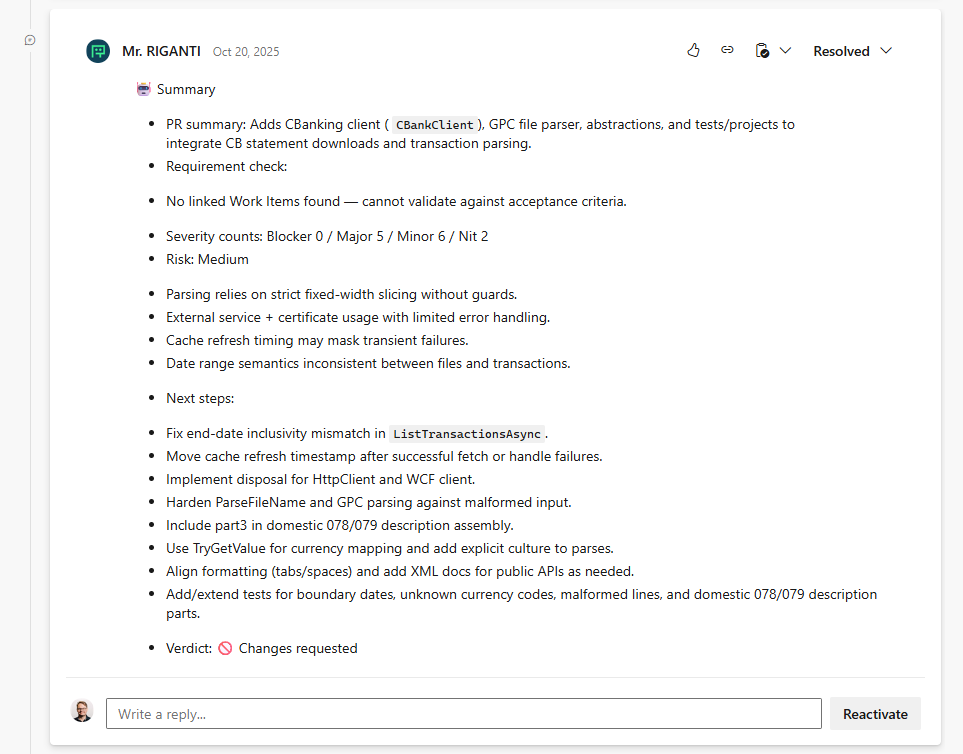
Currently, Mr. RIGANTI doesn't set code review verdict to "Approve" or "Request Changes". This is to avoid any potential issues with blocking pull requests. This feature is coming soon.
If the pull request receives new commits and Mr. RIGANTI is still assigned as a reviewer, he will trigger another pipeline to review the new changes in the pull request.
If this becomes overly verbose, we recommend to remove Mr. RIGANTI from the list of reviewers after his first review, and then assign him again when you want him to review the new changes.
Assigning Issues (Work Items)
When you need Mr. RIGANTI to implement a feature or fix a bug described in an issue (work item), assign the issue to him and move it to the Active state (also named as Doing or Approved based on the project's process template). He will open a new pull request, start a pipeline, implement the solution, and then commit and push the changes to the repository.
By default, Mr. RIGANTI watches only Requirement, Task, and Bug work item types. You can change this in the project settings.
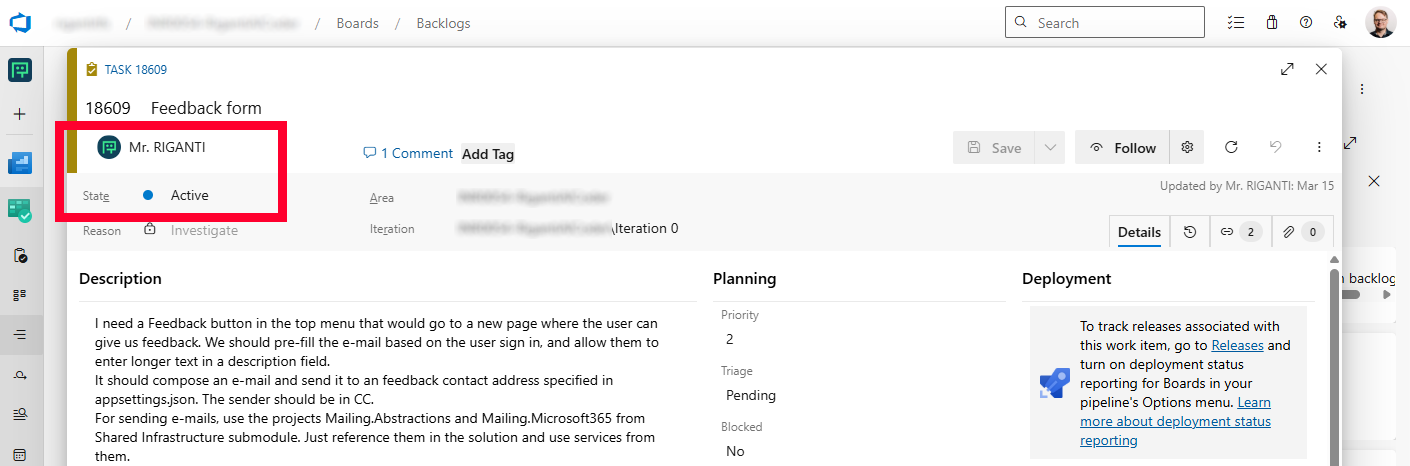
To let you know that Mr. RIGANTI started working, he will post a comment with a link to the pipeline in which he runs. Feel free to look at the detailed logs to oversee his actions.

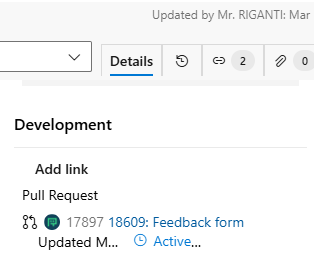
He will start a new draft pull request and work on the implementation. You can easily navigate to the pull request by clicking on it in work item links.
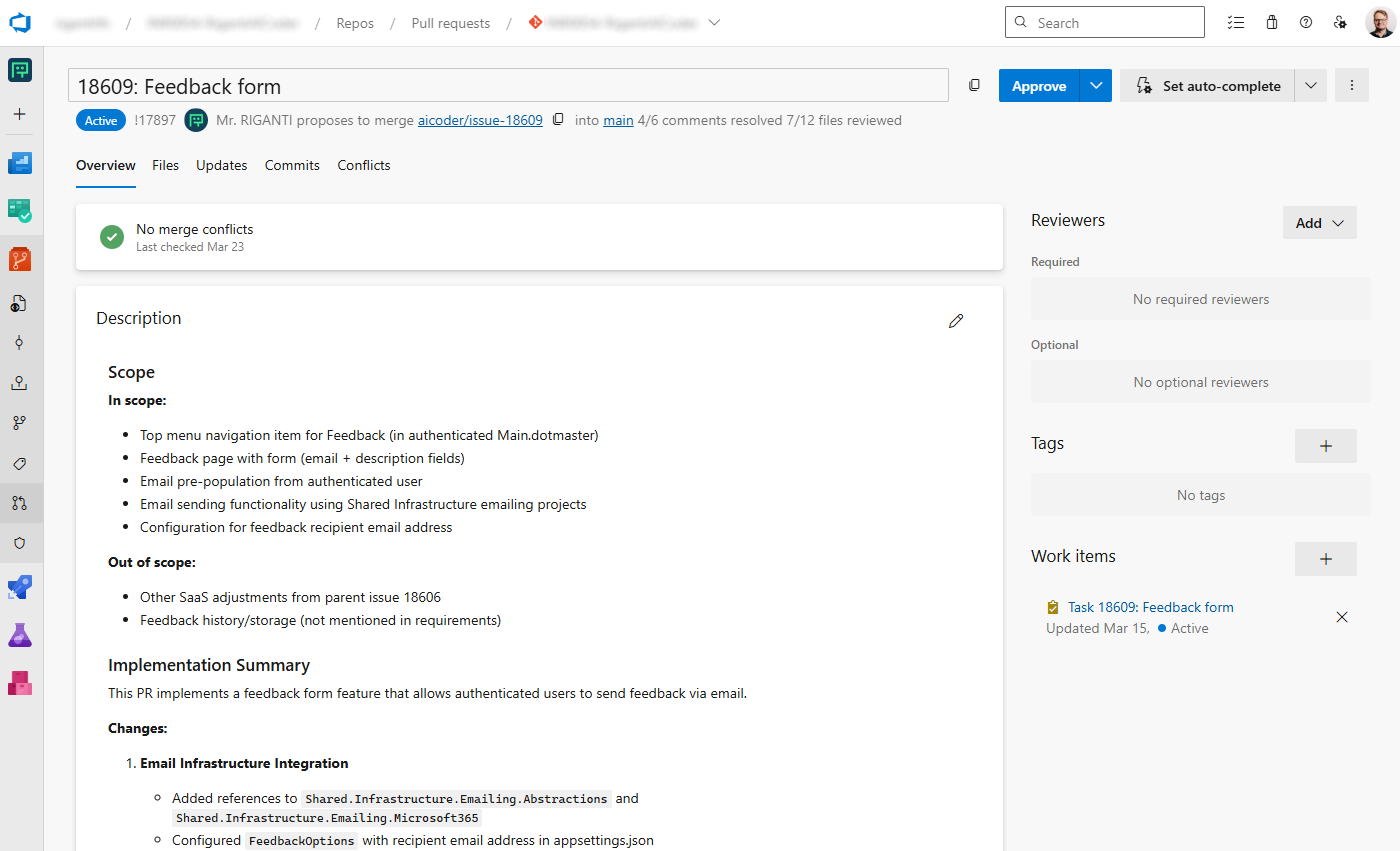
The pull request title and description summarizes the changes implemented, and once Mr. RIGANTI finishes his work, he will mark the pull request as ready for review and update the comment in the work item to indicate the work is completed.
Mention in Pull Request Comments
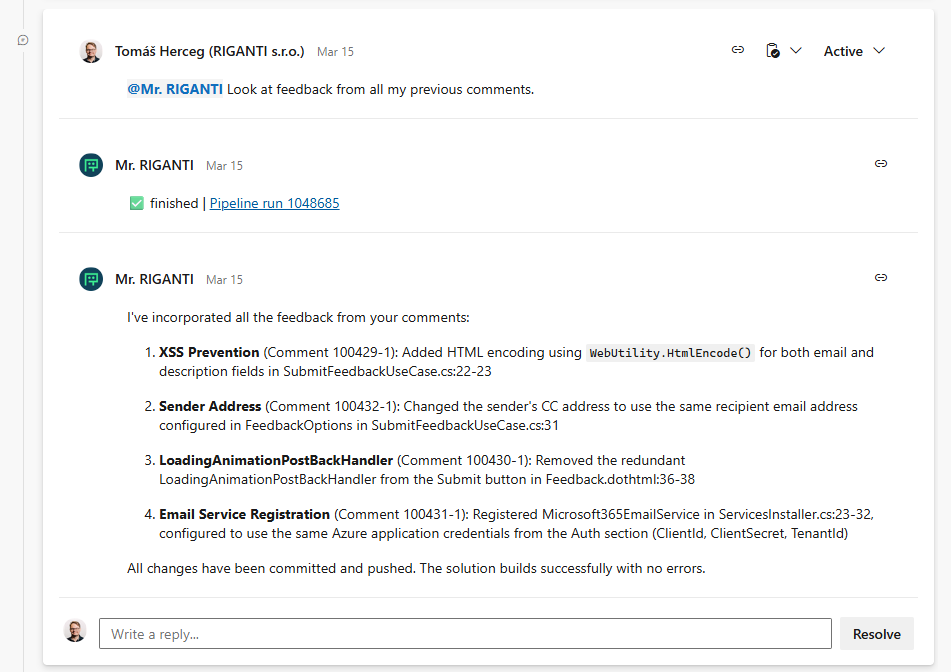
Although Mr. RIGANTI tries to understand the code base, follow the conventions and best practices, it is likely you will want to make some changes.
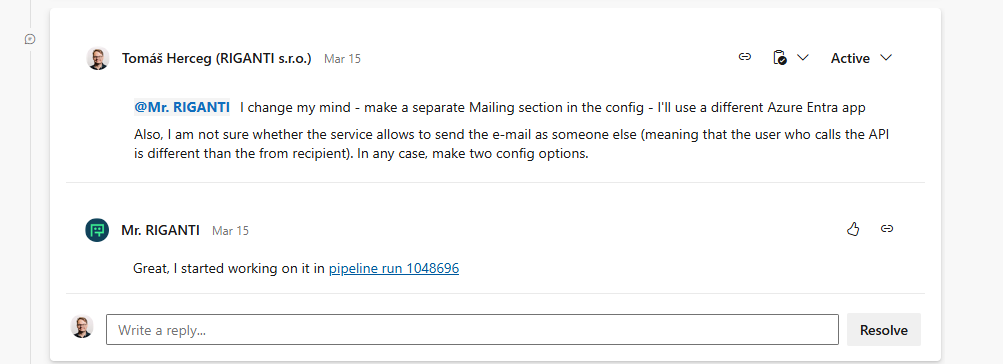
To ask him to change something, just mention him in a comment and describe what you want him to do. He will start a new pipeline, make the changes you requested, and push them to the pull request.
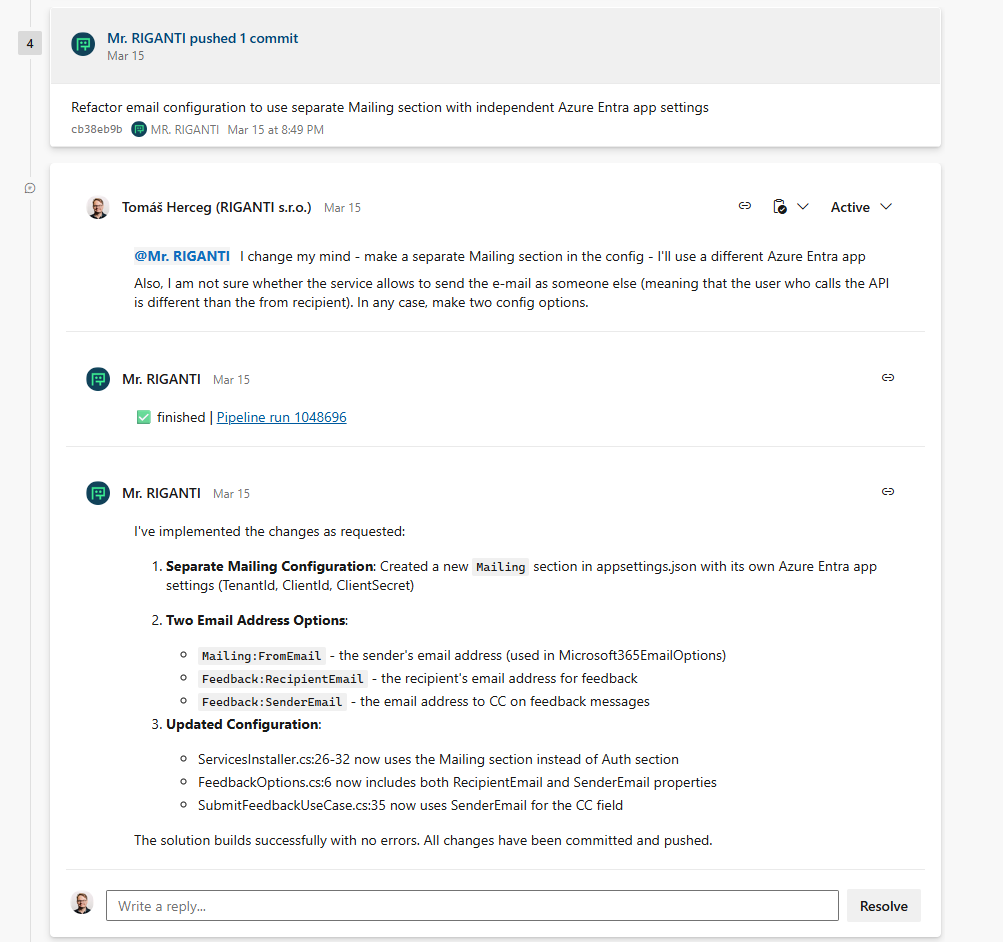
After a couple of minutes, Mr. RIGANTI will finish the changes and make a new push to the current pull request. He will edit his comment to indicate the work is done, and post an additional summary of his changes.
Be careful when using mentions - each of them triggers a separate pipeline run.
If you want Mr. RIGANTI to address multiple changes at once, post multiple comments without mentioning him, and then mention him in a single comment asking to address all the changes together.
Mr. RIGANTI App Features
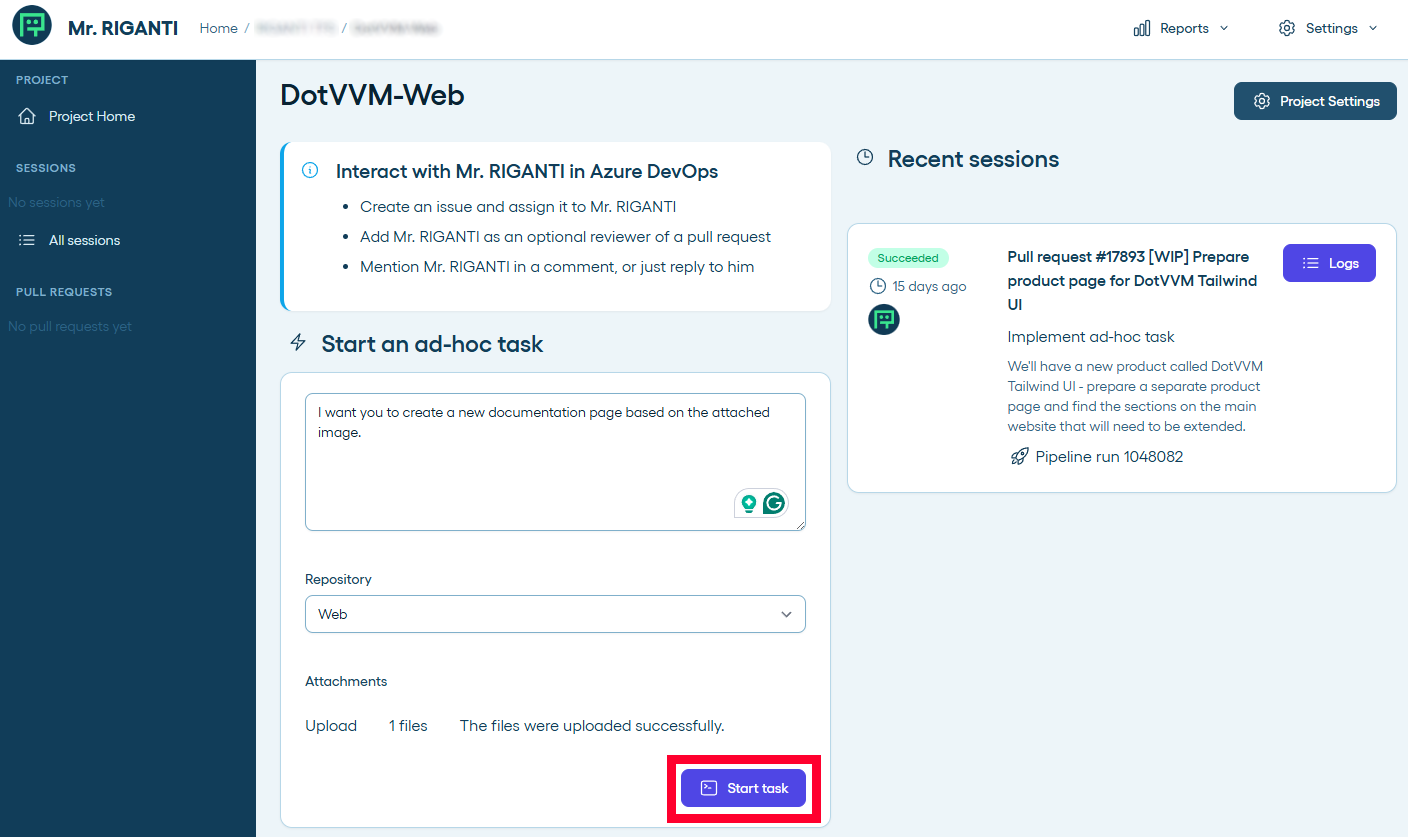
You can find additional features in the Mr. RIGANTI. Just sign in and open the project you want to interact with.
For example, you can give ad-hoc commands to Mr. RIGANTI without interacting through Azure DevOps. Just open the project dashboard, type your command, and let him do the work. You can event attach files.
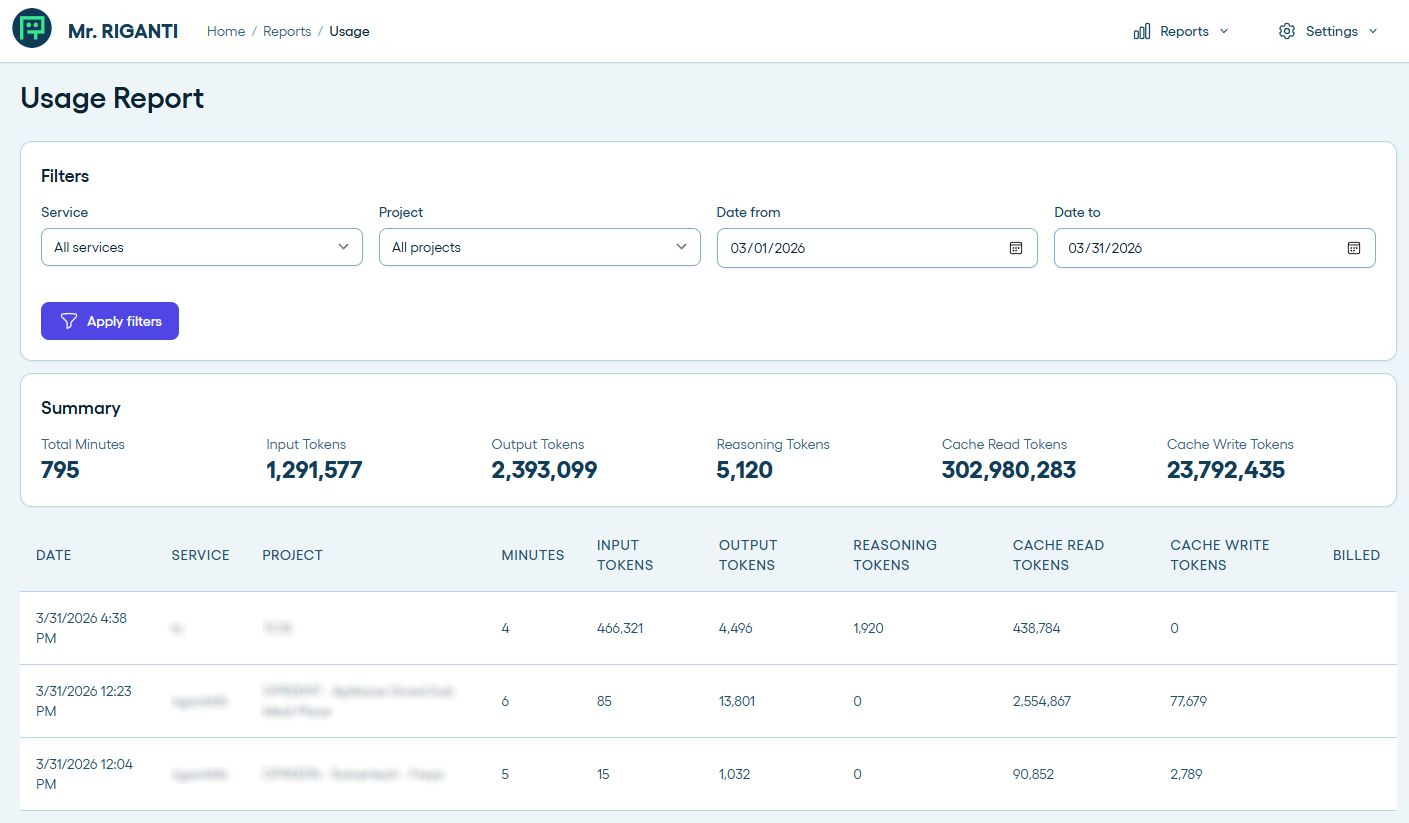
The web dashboard also allows you to track token usage for each runs, or look at details of every Mr. RIGANTI's session.
Troubleshooting
If you run into any issues, try to investigate the pipeline logs - they usually point you to the cause of the problem.
If you believe you found a bug in Mr. RIGANTI, reach out to us - we'll be happy to help.
Purchase a Plan
The service is purchased through Microsoft Marketplace. You can choose a plan (based on how many Azure DevOps projects you want to onboard) and the billing frequency (monthly or yearly).
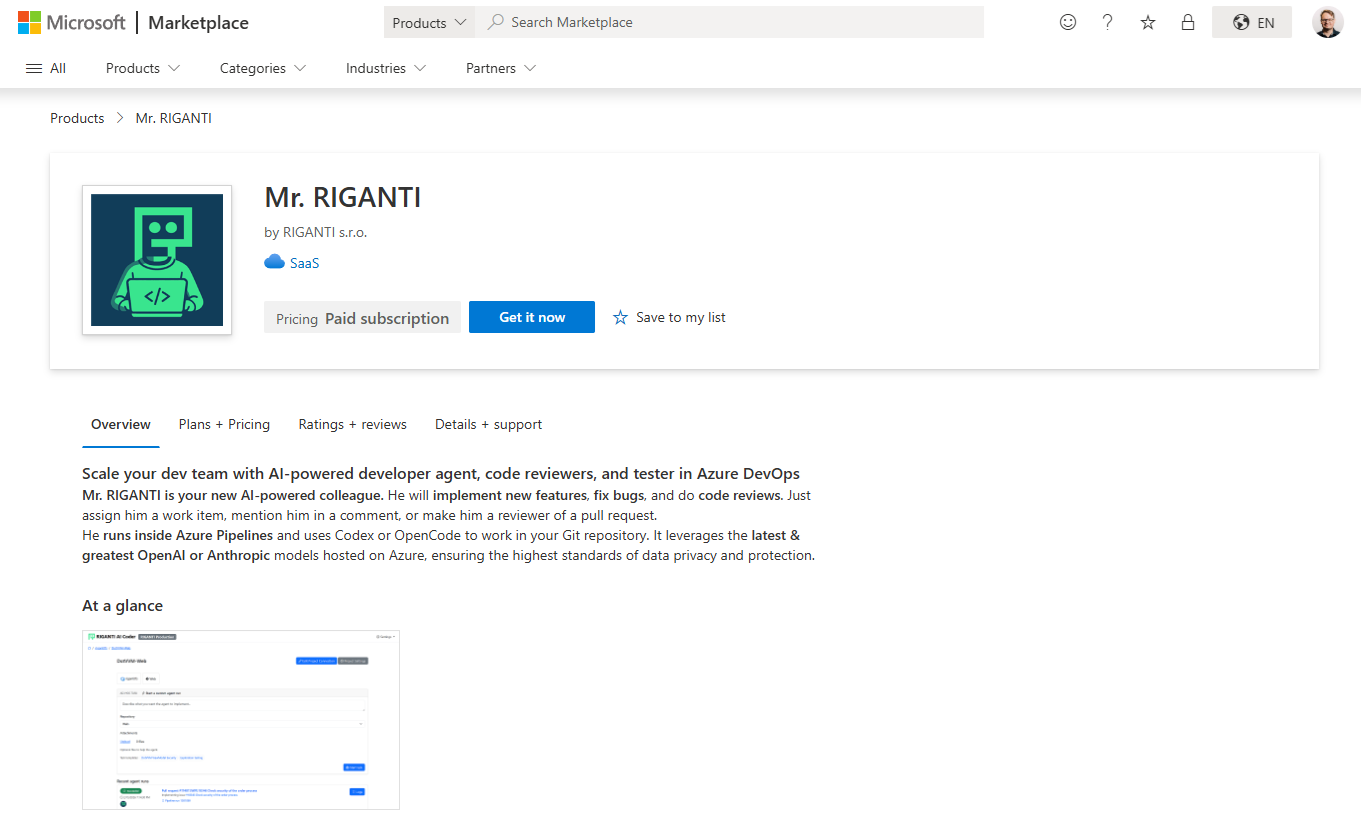
After confirming the purchase, you will be redirected to the Azure Portal to configure the offer. You can select the Azure Subscription and resource group in which you want Mr. RIGANTI subscription will be billed.
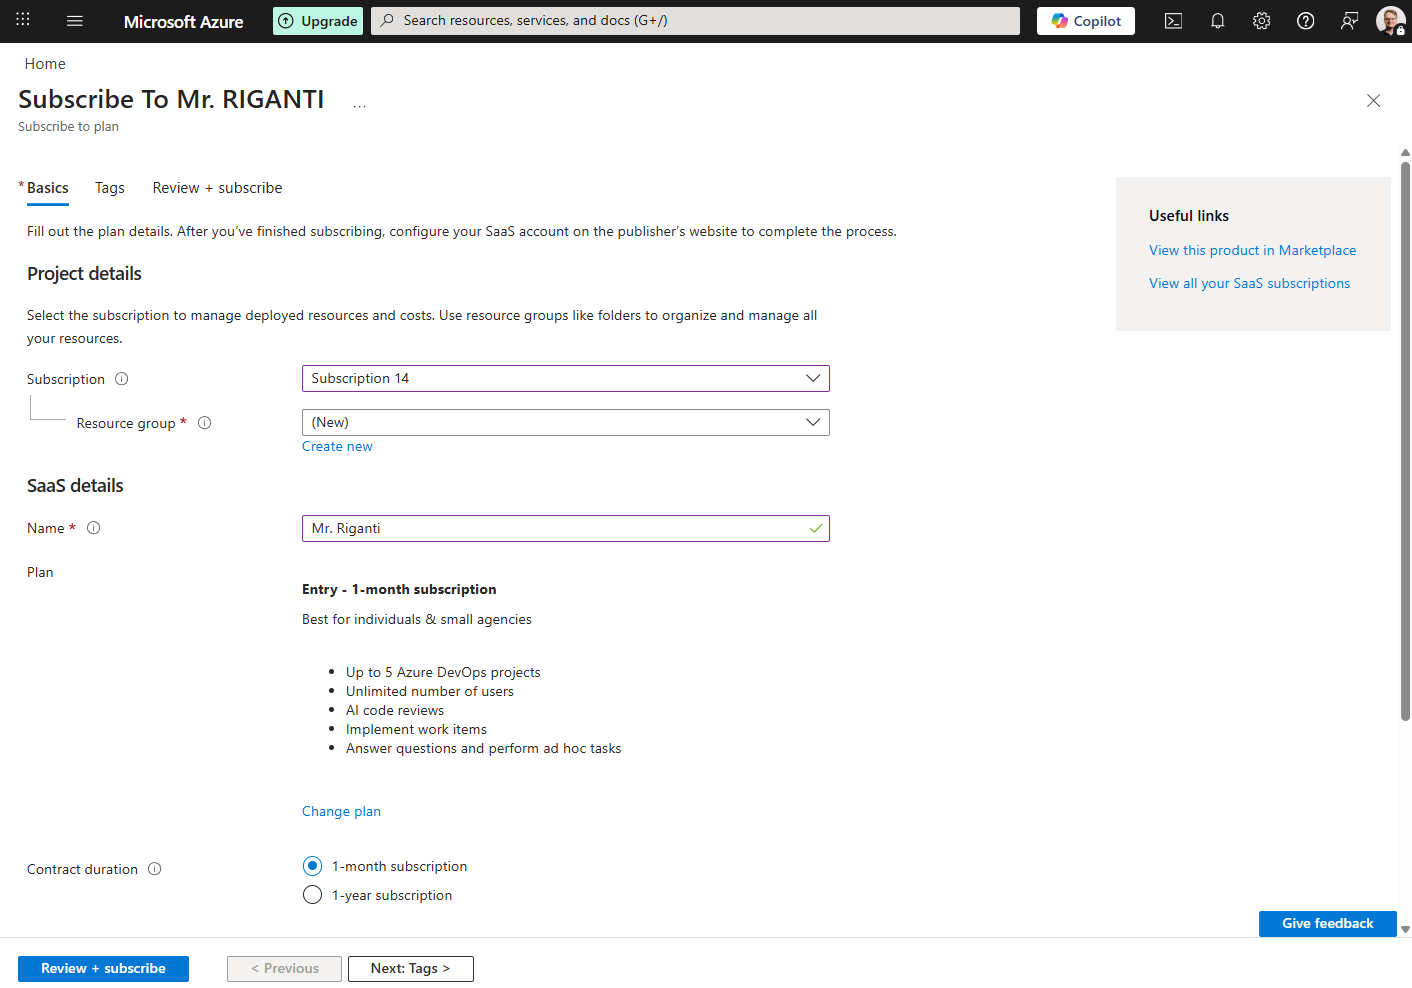
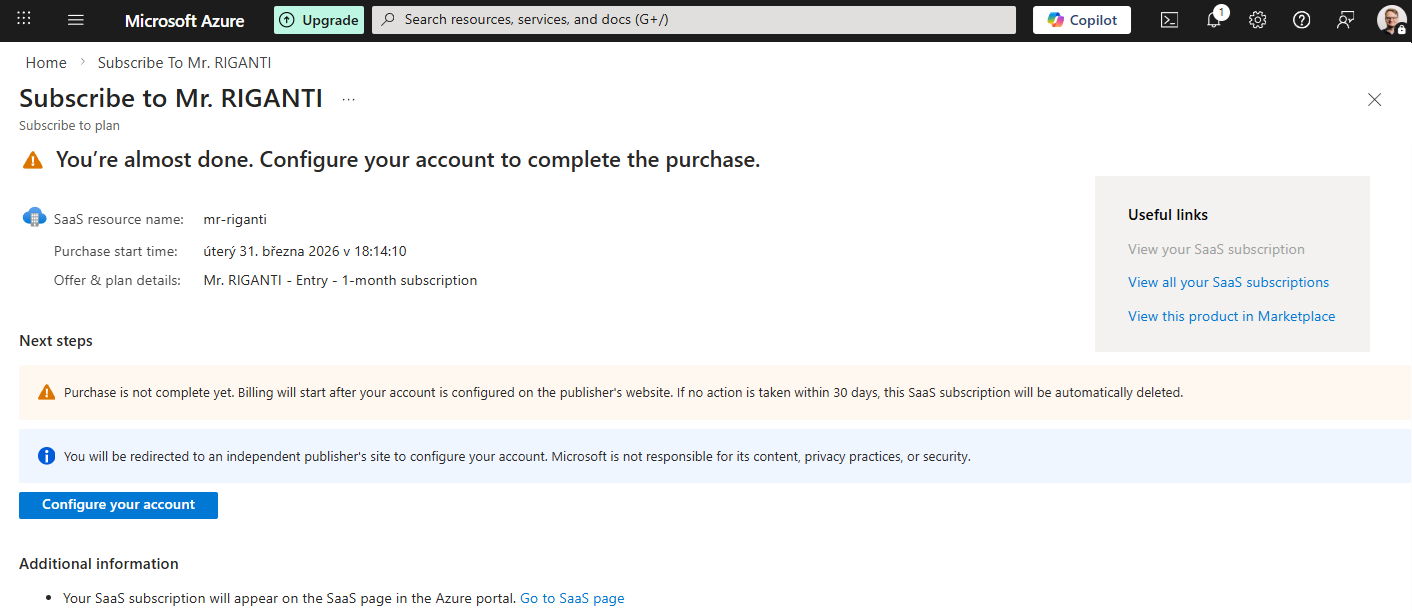
Once you confirm the subscription purchase, you will get to a page with Configure your account button. Click on it to start the onboarding process.
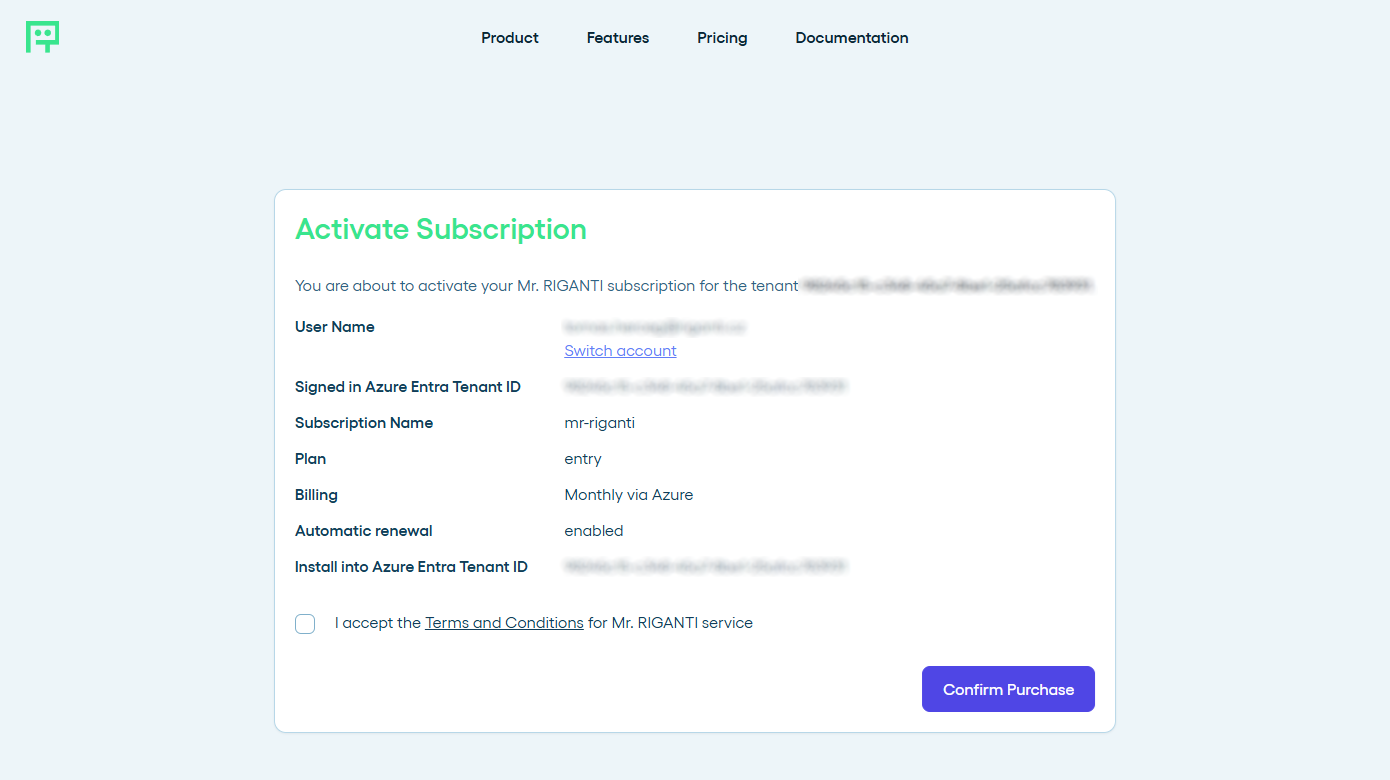
You will be taken at Mr. RIGANTI onboarding page, where you can sign in. Make sure you use the same Azure Entra directory in which you configured the subscription!
FAQ
- Can I use Mr. RIGANTI with GitHub or GitLab?
-
Currently, Mr. RIGANTI supports only Azure DevOps. We are planning to add support for Azure DevOps Server, GitLab, and other providers in the future.
- What coding agents are available?
-
Currently, Mr. RIGANTI uses models hosted in Azure Foundry.
Anthropic models are run within OpenCode harness, OpenAI models use Codex harness.
We are planning to support more coding agents in the future (e.g. GitHub Copilot CLI, Claude Code), and allow to bring your own key to avoid running the model inferences through our infrastructure.
- Can I use my own model and API key?
- Currently, you cannot use your own API key, but this feature is coming soon. Currently, the service uses a shared pool of tokens to provide the best performance and cost-efficiency.
- Is my code and data secure?
- Yes, we take security and privacy very seriously. Reading the privacy policy may sound boring, but you really should do it - we explain in detail what data we store and what we would never touch. All data is transmitted securely and stored in Azure data centers (currently, Sweden, more regions coming soon) in compliance with industry standards. We do not share your data with any third parties and do not use your data for training.
- The code review comments are sometimes off. Can I configure what should be ignored?
- Mr. RIGANTI respects your guidelines in
AGENTS.mdfile and tries to use skills found in.agents/skillsfolders. If you want to improve the quality of output, make sure to review and fine-tune these files. Investigate the pipeline logs to see if Mr. RIGANTI detects the skills correctly.